Pages

Thursday, February 23, 2012

"I'm Just A Jitterbug"

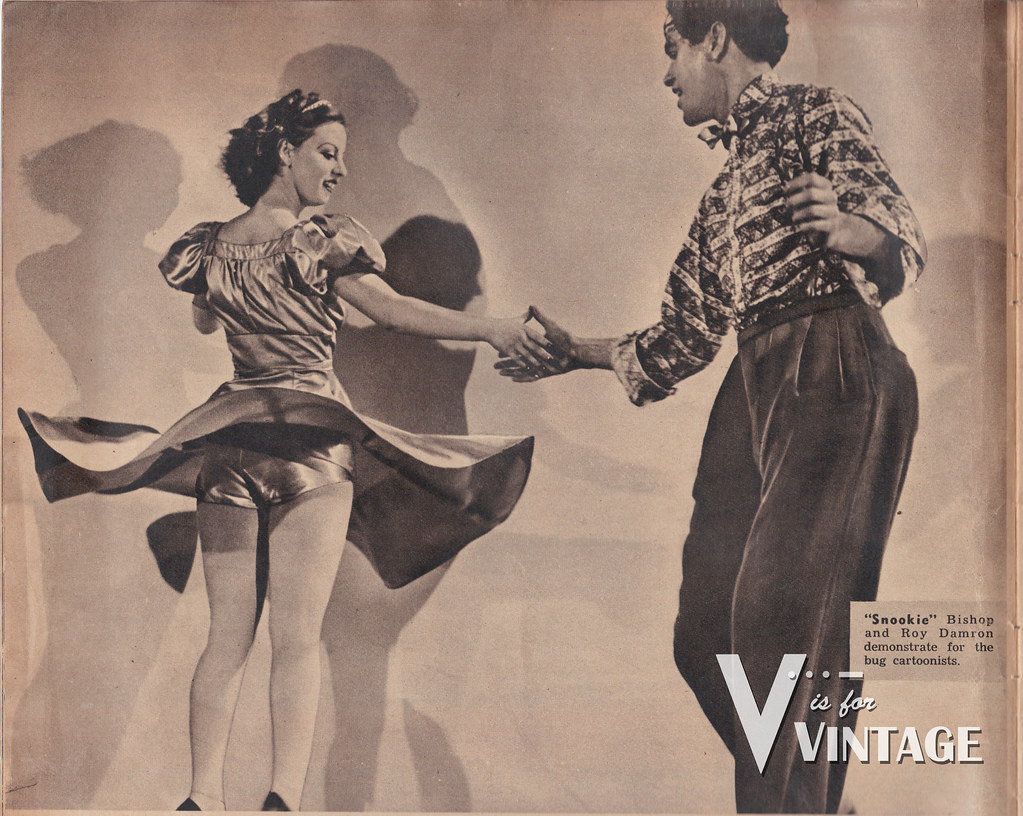
I've fallen off posting about dancing much in the last couple months, but a recent Facebook conversation reminded me that I've been meaning to post this article originally published in a 1939 Look Magazine. It shows some "behind the scenes" shots of LA swing dancers who were filmed as inspiration for the Walter Lantz cartoon short "I'm Just a Jitterbug".

The footage of dancing was rotoscoped for the cartoon (basically traced), which seems to be looked down on by animators, but it's fun for us dancers, because it's so true to life. Only 2 couples are shown in the Look article, but from watching the footage we know that Ray Hirsch and Patti Lacey were part of this project too, because we see their signature moves in it!

As was unfortunately common in this era, there are racist and derogatory images included in the article and cartoon. I have included them in this entry because I feel strongly that it is inappropriate to cut them and not recognize the bigotry present.
----------------------------------------------------------------------------------

Human Jitterbugs Are Models...
For Dancing Insects In an Animated Cartoon

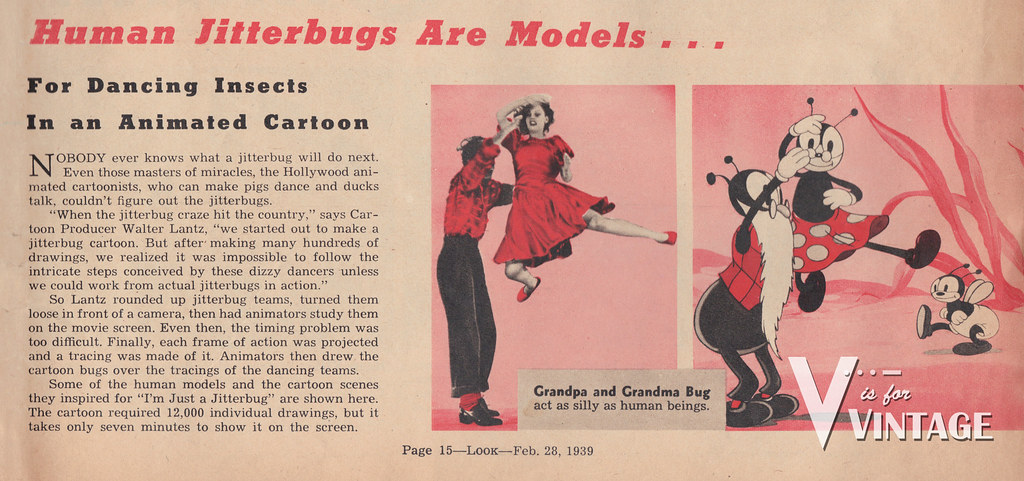
Nobody ever knows what a jitterbug will do next. Even those masters of miracles, the Hollywood animated cartoonists, who cam make pigs dance and ducks talk, couldn't figure out the jitterbugs.

"When the jitterbug craze hit the country," says Cartoon Producer Walter Lantz, "we started out to make a jitterbug cartoon. But after making many hundreds of drawings, we realized it was impossible to follow the intricate steps conceived by these dizzy dancers unless we could work from actual jitterbugs in action."

So Lantz rounded up jitterbug teams, turned them loose in front of a camera, then had animators study them on the movie screen. Even then, the timing problem was too difficult. Finally, each frame of action was projected and a tracing was made of it. Animators then drew the cartoon bugs over the tracings of the dancing teams.

Some of the human models and the cartoon scenes they inspired for "I'm Just a Jitterbug" are shown here. The cartoon required 12,000 individual drawings, but it takes only seven minutes to show it on the screen.

Grandpa and Grandma Bug act as silly as human beings.
(Dancers are Roy Damron and Snookie Bishop)

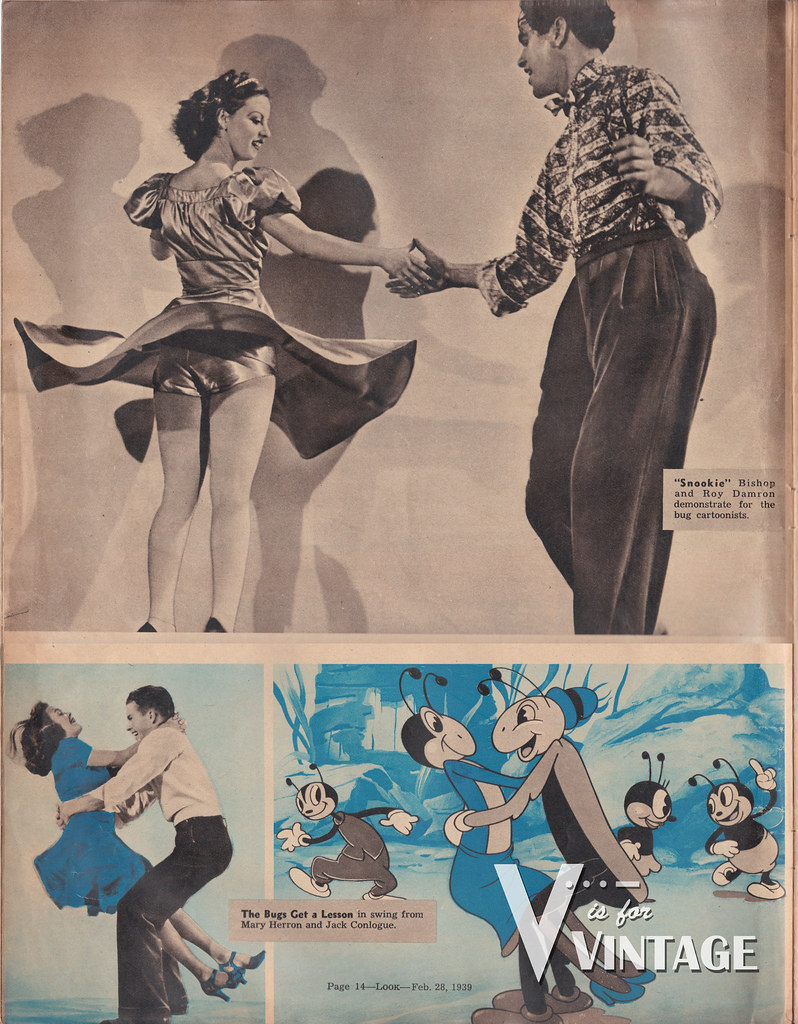
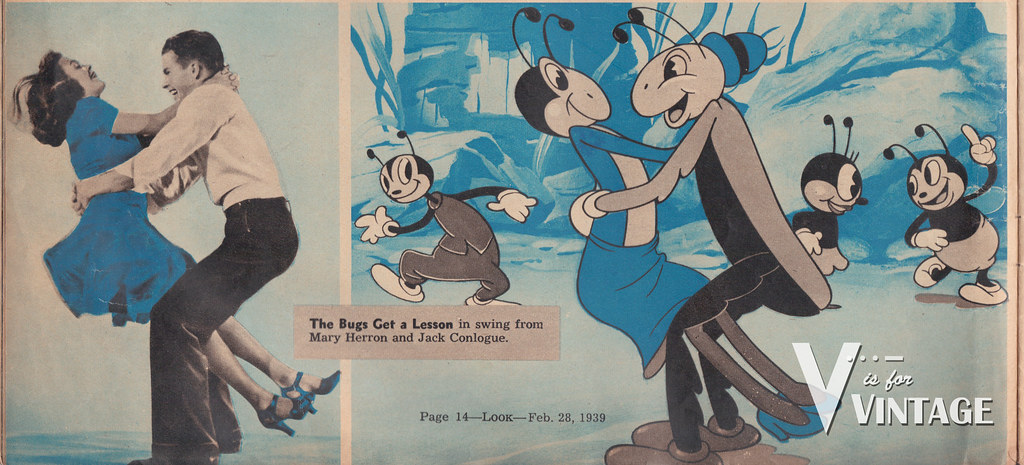
The Bugs Get a Lesson in swing from Mary Herron and Jack Conlogue.


"Snookie" Bishop and Roy Damron demonstrate for the bug cartoonists.


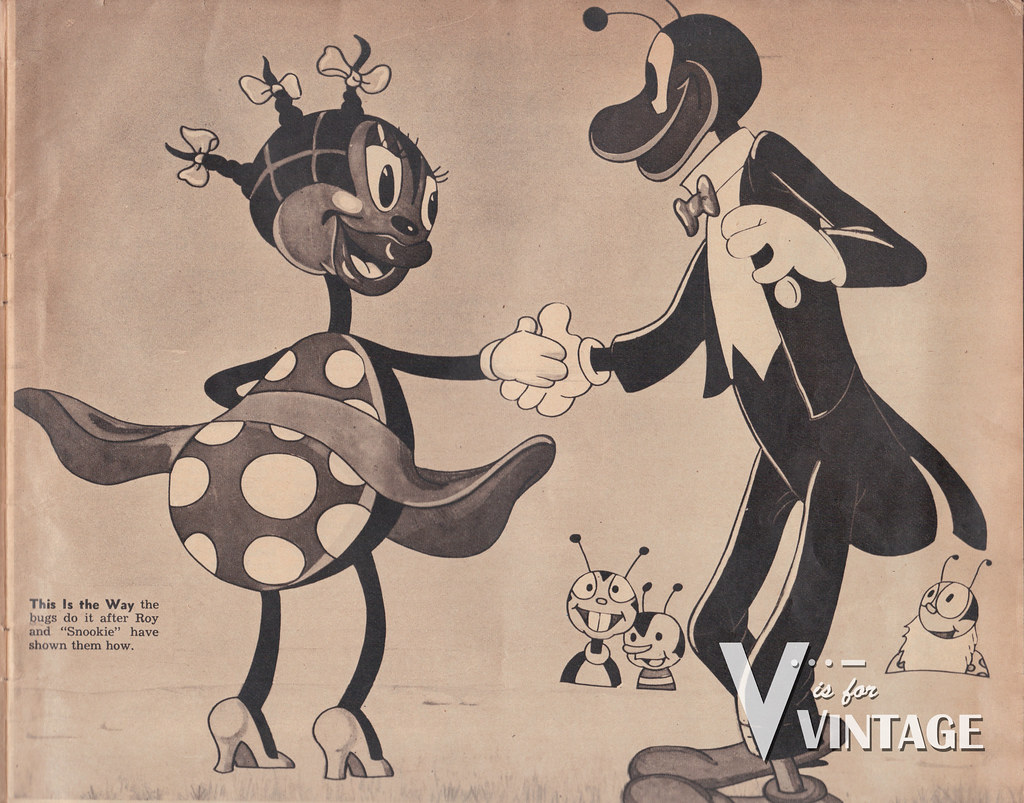
This is the Way the bugs do it after Roy and "Snookie" have shown them how.

----------------------------------------------------------------------------------


And here's the final version of the cartoon! 
Funny thing is, I don't see any of the images from the magazine in the cartoon.
"I'm Just a Jitterbug" (1939)

Because I like to see the unedited version myself, I've included the complete magazine pages below.

Monday, February 20, 2012

The Great LA Air Raid - 2012

As I mentioned in my last post, this weekend we attended the Great Los Angeles Air Raid of 1942 (2012 edition). We had a great time - the weather was beautiful, the band was great, and I had a new outfit! ;) Other than dyeing my shoes I didn't have time to make anything new, but I picked up a few new pieces recently that luckily went together nicely.

I've never been a hat person in the past because they're usually awkward on the dance floor, but I'm challenging myself to wear them to more events. This turban hat was great though - it stayed put nicely the whole night!


Dancing to Dean Mora and The Fort Macarthur Officers Orchestra
Photo by Dave Welch - follow the link for more pics of the event!


There were tons of military vehicles and displays. I think it gets bigger every year!


Cait, Lauren and me - offering a little morale boost for the troops!

Heading to watch the Sherman Tank demonstration.

With Rusty Frank, one of our favorite local swing instructors. She taught a free lesson before the band started.


Sirens with the siren. :)


Climbing up to the top of the Sherman tank was a huge highlight - we felt like conquering heroes. Or at least really tall!


In addition to the military vehicles, there was a vintage car display - Lauren's husband Matt made the clever display below with vintage tires. 

With Joshua Curtis, the author of Sunkissed. Love that book.

V for Victory! ...-
---------------------------------------------------
Gloves: MartasRose
Hat: antique store
Shoes: Aris Allen, dyed by me

Monday, February 13, 2012

Dyeing Aris Allen Oxfords

This week is one of my favorite events of the year, but unfortunately I don't think Hallmark will ever make a card in honor of the Great Los Angeles Air Raid of 1942.

The Air Raid is held at Ft. Macarthur in San Pedro, and is primarily outdoors and unpaved. Last year was rainy, but we've been having a mild winter this year so I hope the weather holds through the weekend! Even if the ground isn't muddy it'll still be dirty, so I want some warm sturdy shoes to wear. Last year I wore my Aris Allen oxfords and they got nice and muddy, and last weekend I finally got around to dyeing them, which I've wanted to try for a long time.

This isn't exactly a tutorial on how to dye these shoes because I feel that this technique can be improved on, but in case some gals want to dye theirs I thought I'd document what I did. If you have any ideas how to improve this process, please comment below! And if you haven't seen it, read the Dreamstress's Shoe Dyeing Tutorial.


Supplies:
Dye - I chose Dylon, RIT would probably work fine
Salt - this may or may not be a good idea, see below
Gloves - get a 5 pack, I used at least 3 pairs
Brush - I chose a cheap sponge version, it worked fine
Old toothbrush - to clean shoes
White Tissue paper - stuff inside shoes while dyeing
Not shown: 
Bowl for dye (glass or stainless steel)
Spoon for mixing dye (do not use for food)
Paper towels!

Using a toothbrush or something similar, clean your shoes. Mine still had lots of mud from last year, and you need to clean off all the junk so the dye can take evenly.

I mixed up the dye according to the package instructions, but they wanted me to add salt to the dyebath water. Since I painted my shoes, I added it to the dye - which I'm not sure was a good move...

I didn't tape off any trim, but if you want to, do that now.
Stuff the shoes with tissue paper or paper towels.
Using the brush, thoroughly wet the shoes with plain water, then apply the dye. It's like watercolor painting, wet-on-wet. It spreads fast and goes on fairly evenly.

Wet shoes, after one coat. I let them dry for a while, then did a second coat.

After drying, the shoes were really splotchy! I'm not sure if it was from the dye or the salt, but it brushed away. I had already pitched the toothbrush, which was the wrong tool for the job anyway, so Chris got me a soft bristle brush from his shoe polishing kit.

 Shoe Brush.

Ahh, much better! not perfect, but good enough. They are more even-toned in real life.

Here's a warning about this project. The velvet nap seems like it's made of cotton, which is a natural fiber and dyes well with Dylon or RIT. The stitching and binding are synthetic and doesn't pick up the dye for natural fibers well, which is why you get the neat contrast. BUT!! it looks like under the cotton nap is a synthetic base, so the areas that are rubbed down through wearing don't take the dye well either.

If you really want to dye well worn shoes, I'd recommend mixing together dyes that are intended for natural and synthetic fibers. But then you'll loose the contrast stitching because that will dye too. Another option is to use a lighter shade of dye so the contrast won't be as strong.

FYI, I never wore these shoes much, maybe out dancing 5 times? That was enough to wear down the nap, I guess.

I'm still really happy with how they turned out! I like them in brown MUCH more than the off-white from before, and the contrast stitching is so cool. Most of the uneven color is on the inside of the shoes so it's not obvious, and I'm not above touching them up with a marker. :) Now I just need to find the Scotchgard and spray them down!

Sunday, February 5, 2012

DPP 2012 Costume Contest Entry

I just sent in my entry for the 2012 Your Wardrobe Unlock'd and Foundations Revealed Double Period Project Competition. This year's periods were 1812 & 1912, and since I created a new ensemble for the Jane Austen Evening I decided to enter it. I didn't get quite enough photos of the gown at the event, and I didn't have any good photos of my stays, so last weekend Chris & I went out and snapped a few more. I *really* wish that we could have gone to the Huntington Library & Gardens in Pasadena for the photoshoot because the buildings and gardens are just perfect, but we didn't have time so we explored a regional park close to home.

Here are the photos I submitted to the contest plus a couple extras, enjoy!


Wednesday, February 1, 2012

Playing with Toys


I picked up a new old toy for myself today - a while ago I took my grandmother's vintage Singer sewing machine into the shop, and today I finally picked it up! She's a beaut, if I do say so myself. I couldn't resist snapping a few shots with my fancy-pants Christmas camera to share with you. (I need a new hobby like I need a hole in the head, but learning photography is turning out to be fun. :)

The plates on this machine are exquisite. There was another vintage Singer at the shop that wasn't nearly as pretty. ;)


I've had the machine for maybe 5 years now, and I always knew that I *could* sew with it, but until I started reading sewing blogs it never occurred to me that a lot of people prefer the vintage machines to modern ones! Lauren and her husband inspected it for me and warned me that the electrical needed to be replaced, so off to the shop it went. She got a couple new wires, a new belt and a tuneup, and now she's ready to go. I just need to get the table out of the garage and negotiate room for it in the living room somewhere - the sewing room is full up!


In honor of my grandmother, Lucille, my new old machine is christened Lucie. :)

This is the BACK of the machine. No modern manufacturer would bother with such lovely details on the back of something anymore.

Possibly the coolest part of the whole machine - if you look close you can see the spool of thread at the bottom of the "S", and the thread goes through needles. Someone should reproduce this and make jewelry or something.

I'm a complete novice about this, but I'm discovering that the nifty thing about vintage Singers is the serial plate for each corresponds to the date of manufacture. According to the Singer website, this machine is from the end of 1940. HOW COOL IS THAT?! My dad doesn't know if the machine was bought new or used (the family moved around during the war), but he said it definitely came with them during the move from Minnesota to California in the 50's.

Now I need to find some family photos of garments that Grandma sewed right? 
Aunts, come to my rescue! :D