Last week I finished my entry for the Historical Sew Fortnightly #5 - I'm falling further and further behind! Whoops. I'm taking off for the next couple challenges, maybe I'll catch up then. Or not. ;) Either way, I'm still glad to be part of this group because it's helping me focus on certain projects that have been in the works for way too long!
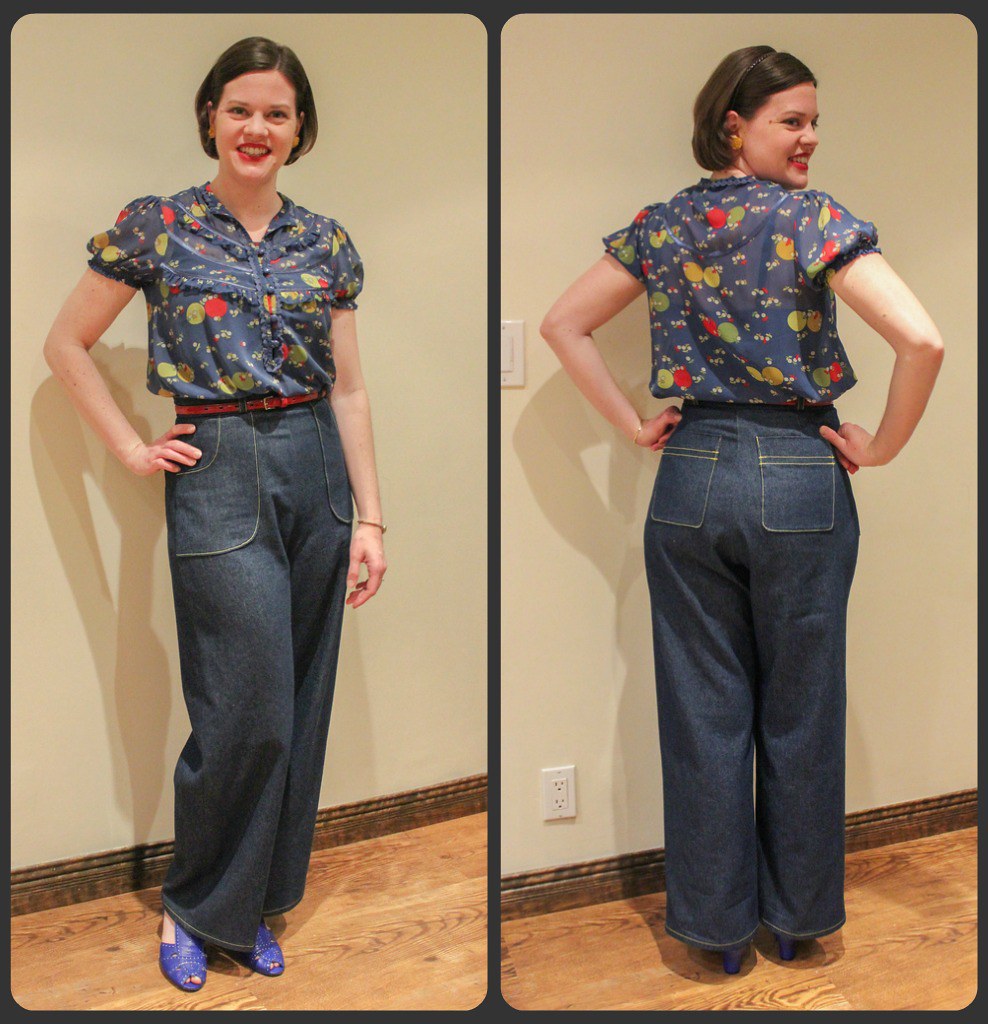
This entry is inspired by the 1930's Dust Bowl, which seemed to be a popular theme for this task. I've been wanting some vintage-y jeans for a long time and did the pattern work for these last summer, and I plan on living in them until they're in tatters (which will make them even more "authentic" ;). For this outfit, I paired them with a feedstack print top for a good 30's look.
The Challenge: #5 Peasants and Pioneers - As wonderful as making pretty, pretty princess dresses is, the vast majority of people have always been poor commoners, whether they were peasants working the land, servants in big houses, or (later), pioneers carving their own space in new lands. This fortnight let’s make something that celebrates the common man.
Fabric: Lightweight Denim
Pattern: Wearing History's Smooth Sailing Trousers - modified to be flat-front, and added patch pockets front and back
Year: mid-1930's
Notions: Thread (blue and contrast yellow), metal zipper
How Historically Accurate is it: More "inspired" than accurate - a few women wore trousers in the 30's, but jeans like this were really still menswear. The fit is altered to have a higher crotch (not period correct, but much better for movement.) And I used a metal zip instead of my standard invisible, but a button placket would be even better.
Hours to Complete: Maybe 3 for patterning, 10 for sewing & fitting, and 4 for redoing the back pockets several times. So at least 17, and that's a conservative estimate.
First Worn: Dancing at Atomic Ballroom last Friday
Total Cost: ~$20 for fabric, $5 for thread and zipper
Showing posts with label Sewing. Show all posts
Tuesday, April 2, 2013
Wednesday, January 30, 2013
A "1938" Coat - HSF #2 (UFO)
Here's my first entry for the Historical Sew Fortnightly! It's a couple days late and there's no fancy photoshoot because I've got a cold right now. Looking at the challenges, I think I'm going participate in about half of them and turn it into an Historical Sew Monthly - that pace will work better for me and the projects I want to complete.
Nearly 2 years ago I bought a vintage coat with a ripped and shattering lining. I HATE repairs and alterations, so it's a sign of how much I love this coat that I was willing to work on it - except that I stopped right before it was done! The project stalled out in Fall 2011, with basically only the buttons and hems to go.
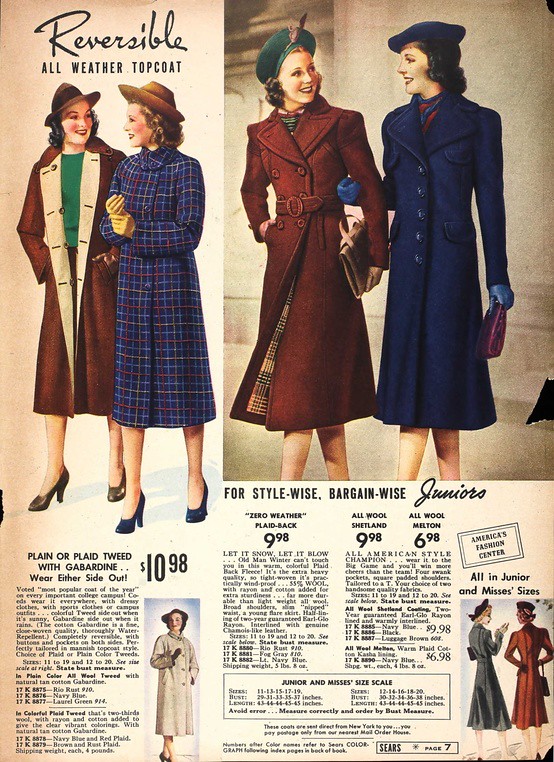
Originally I estimated this coat to be from 1939/40 and I was going to fudge it into this challenge (supposed to be 1938 or earlier), but then I came across this page of overcoats from the Sears 1938 catalog - the navy one has the same details as mine (wide lapels, princess seams, sleeve cap darts), so I definitely think my coat could be from 1938!
The old lining was shredding, so I carefully removed it and traced it off to make a new pattern. I referenced Easy Guide to Sewing Linings for this bit, and even though the process is fairly self-explanatory, the book had some good tips that made the project easier. I also handmade new shoulder pads and had it cleaned and pressed before inserting the new lining.
The Challenge: #2 UFO (UnFinished Object)
Fabric: Burgundy Rayon Satin for the replacement lining
Pattern: Traced off the original coat lining
Year: 1938-ish ;)
Notions: Handmade shoulder pads, replacement buttons, hem tape, thread
How Historically Accurate: Nearly 100%! It helps that I could use a machine and had the original to copy. The only thing that would have been more accurate would be rayon hem tape instead of polyester.
Hours to Complete: Maybe 60 total, about 8 hours for this challenge. I'm super slow!
First Planned Wearing: Saturday February 26, 2013 to the Great LA Air Raid
Total Cost: About $30, not including the purchase of the coat
Nearly 2 years ago I bought a vintage coat with a ripped and shattering lining. I HATE repairs and alterations, so it's a sign of how much I love this coat that I was willing to work on it - except that I stopped right before it was done! The project stalled out in Fall 2011, with basically only the buttons and hems to go.
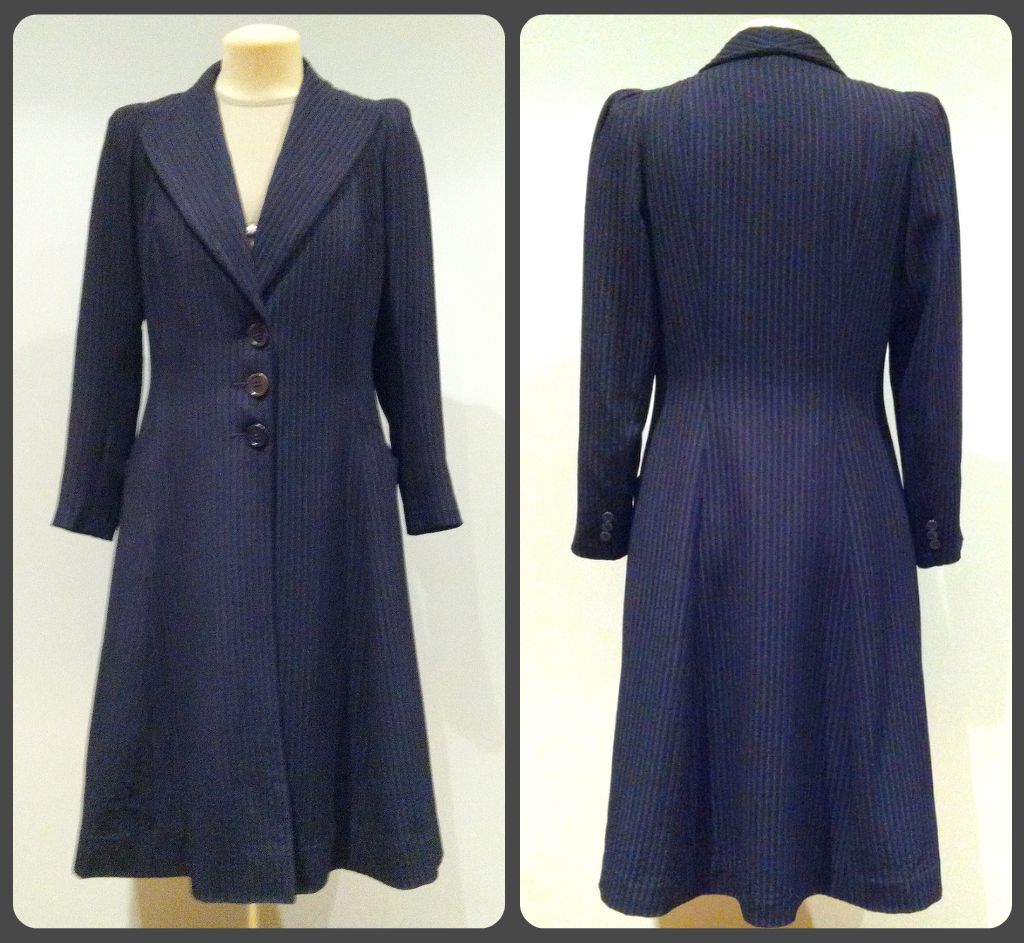
Originally I estimated this coat to be from 1939/40 and I was going to fudge it into this challenge (supposed to be 1938 or earlier), but then I came across this page of overcoats from the Sears 1938 catalog - the navy one has the same details as mine (wide lapels, princess seams, sleeve cap darts), so I definitely think my coat could be from 1938!
Outside View - the part I didn't make. :)
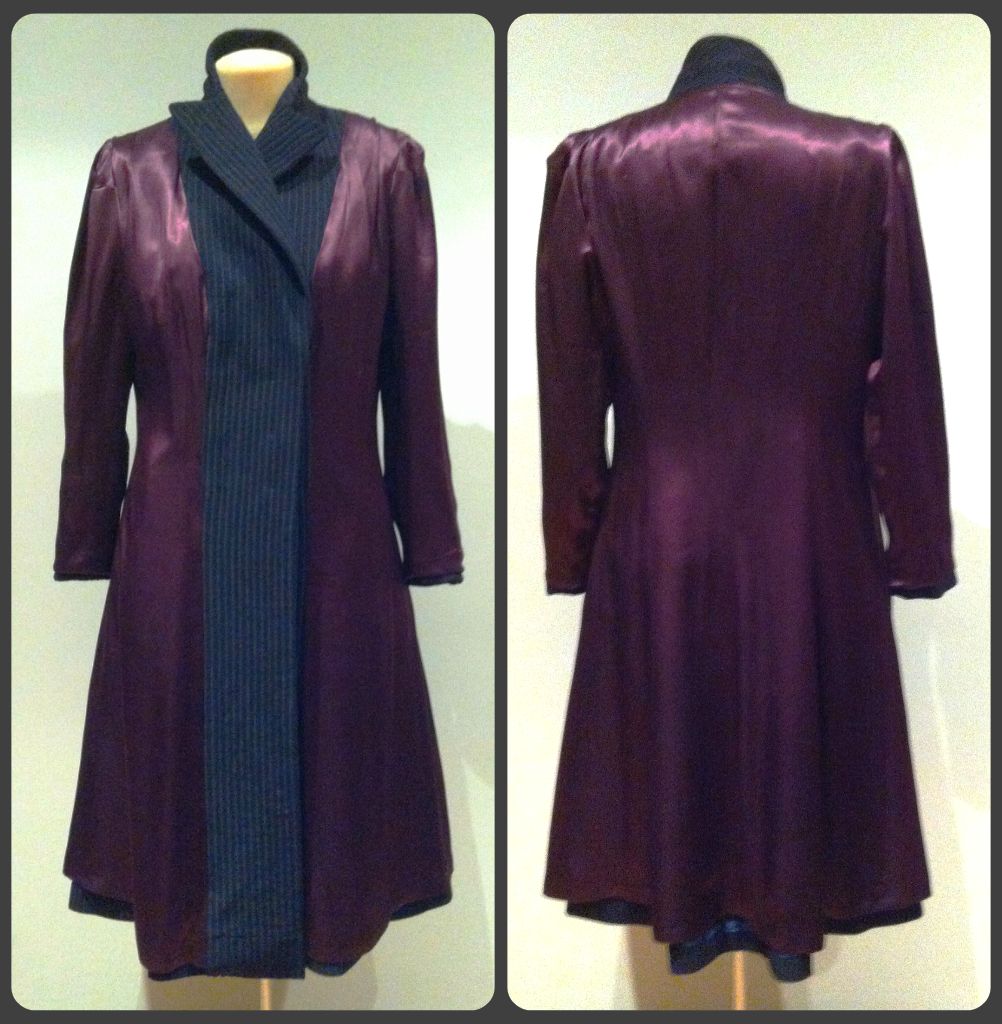
Inside View - the part I made!
Fabric: Burgundy Rayon Satin for the replacement lining
Pattern: Traced off the original coat lining
Year: 1938-ish ;)
Notions: Handmade shoulder pads, replacement buttons, hem tape, thread
How Historically Accurate: Nearly 100%! It helps that I could use a machine and had the original to copy. The only thing that would have been more accurate would be rayon hem tape instead of polyester.
Hours to Complete: Maybe 60 total, about 8 hours for this challenge. I'm super slow!
First Planned Wearing: Saturday February 26, 2013 to the Great LA Air Raid
Total Cost: About $30, not including the purchase of the coat
Labels:
1930's,
Historical Sew Fortnightly,
Make and Mend,
Sewing
Wednesday, January 23, 2013
Marina Breakfast Date
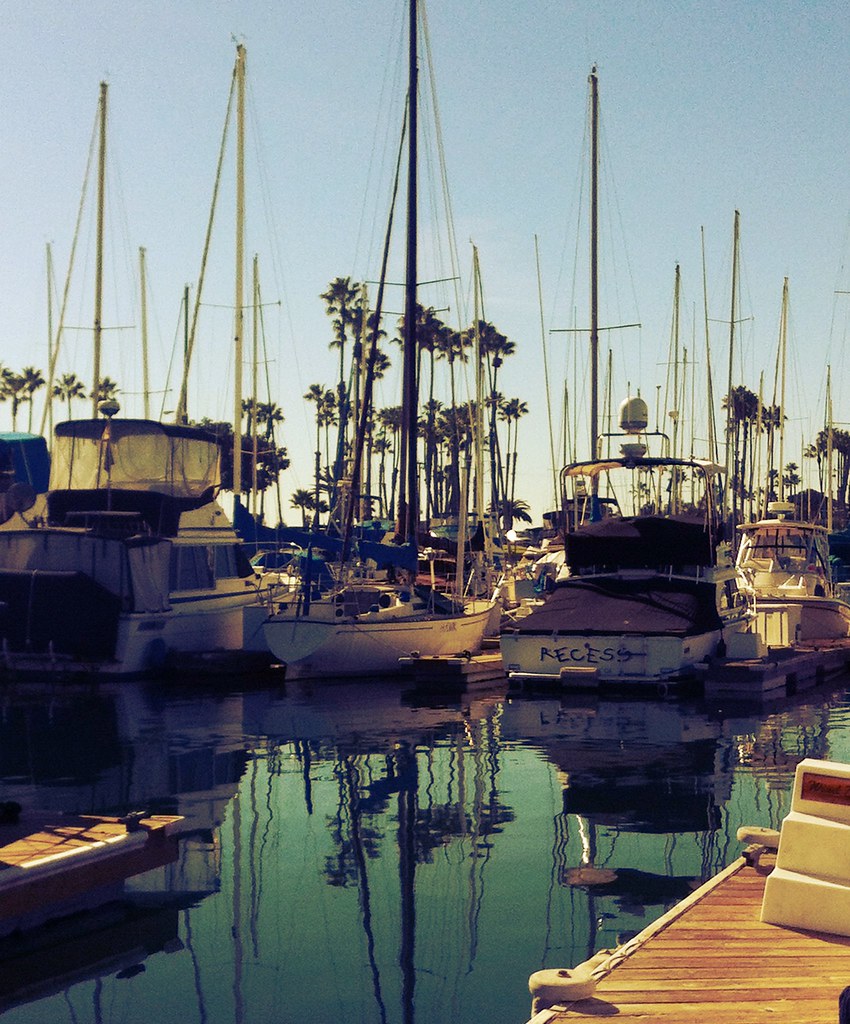
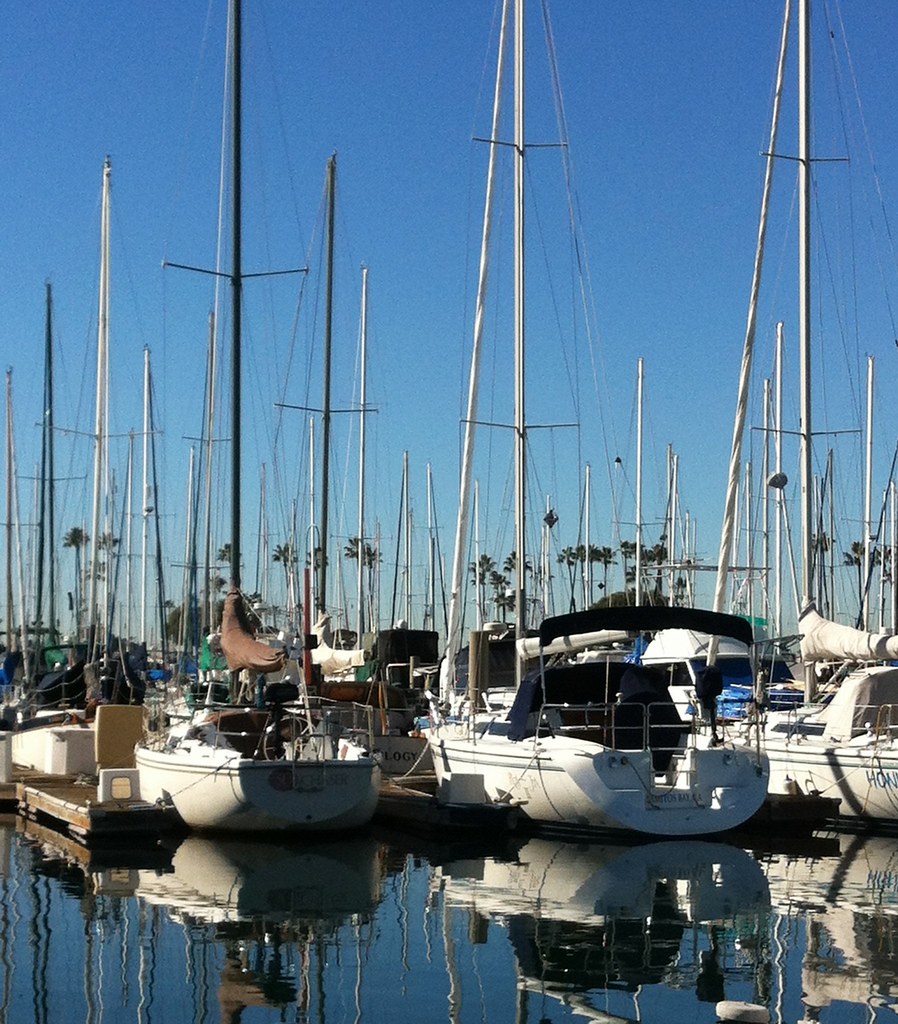
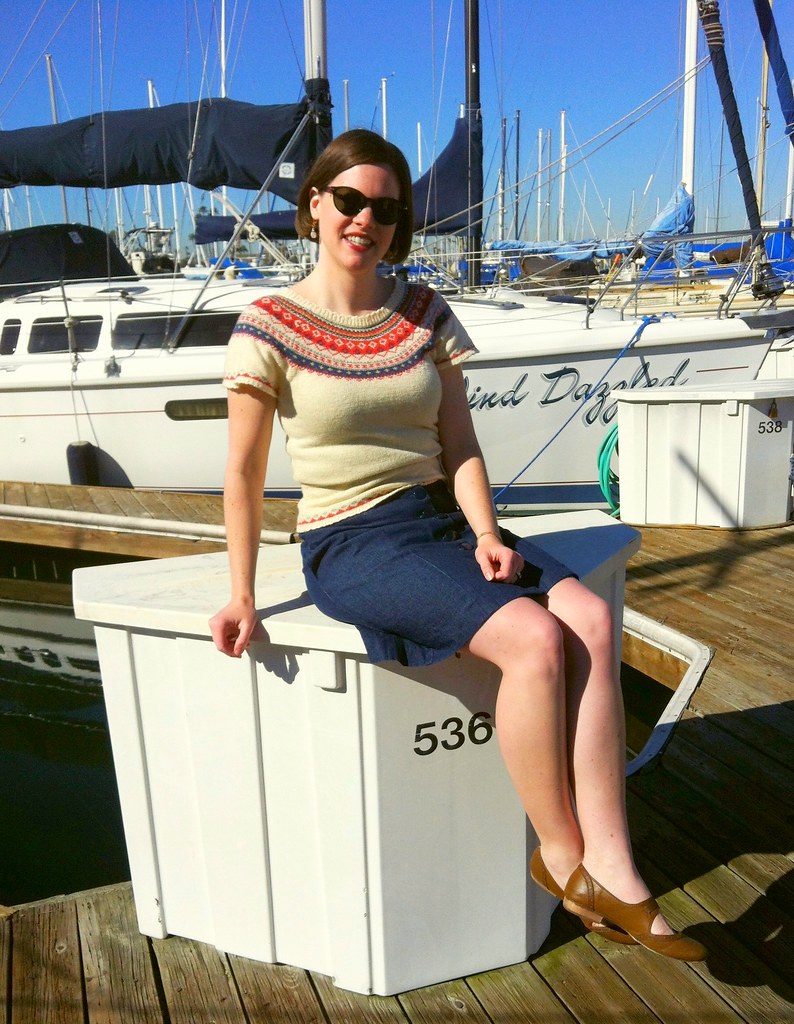
We've been having a-MAZ-ing weather in SoCal this week, so in order to take advantage of it we went on a breakfast date to a restaurant at the local marina. This is the lamest "date" post ever, since there aren't any photos of Chris, but you'll just have to believe me that he's on the other side of the camera - not a random person on the street!
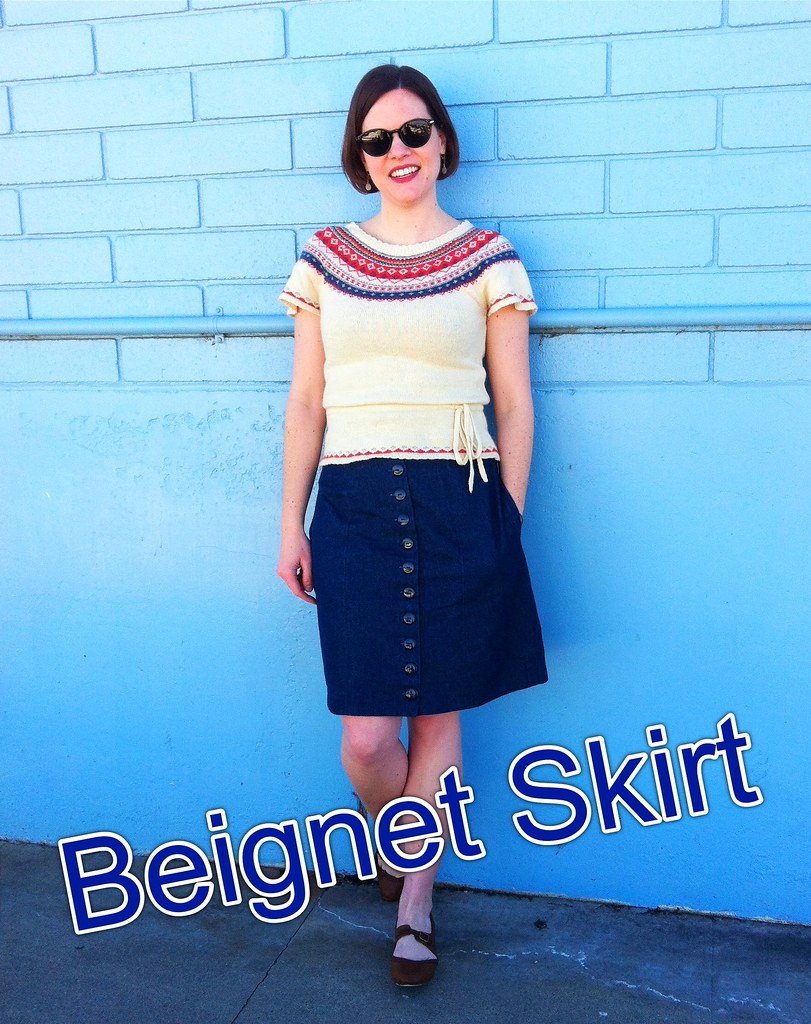
I finally got a photo of my finished Beignet Skirt - it's a nice basic piece in lightweight denim (no lining). My only complaint is that it rides up a little, even though it's high-waisted. I'm honestly a little stumped on how to fix that for future versions. Slim down the waist more? Use a lighter fabric? hmm...
The weather's slated to cool down and get rainy this weekend, so I'm glad we took advantage of our pre-Spring weather while it's here!
**cheesy text via the Flickr app, which would be a pretty killer photo editing app
if they added a few more text fonts.
Kisses! B
Friday, January 11, 2013
Sewing Room
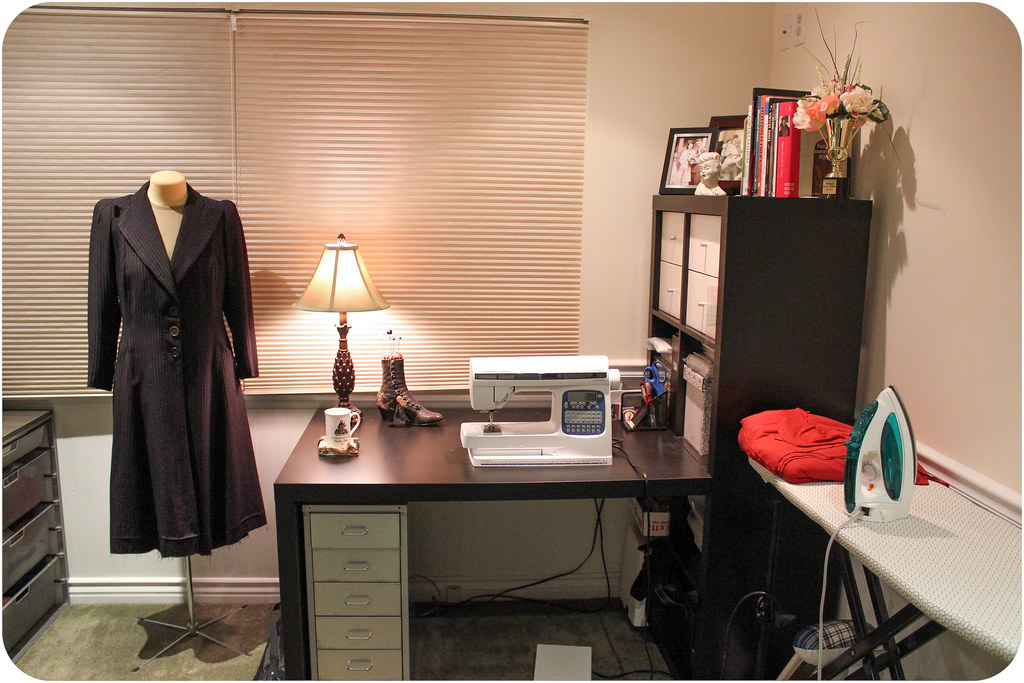
Last weekend I deep cleaned my sewing room, and wanted to snap a few photos since it won't stay like this for long! I try to only keep my current projects out, and I only have a little room for storage in this room. Most of my books and vintage patterns are in the living room, and my main fabric stash is in plastic bins in the garage. Grandma's sewing machine is in the living room too, along with my folding cutting table. Sheesh, that sounds like a LOT when I list it out.
My sewing table is an Ikea Expedit bookcase and desk, and I LOVE it. My overlock fits perfectly in one of the lower cubbies. These windows get beautiful morning light, but unfortunately I don't usually get to enjoy it. And have I introduced my dress form? Her name is Beatrice.
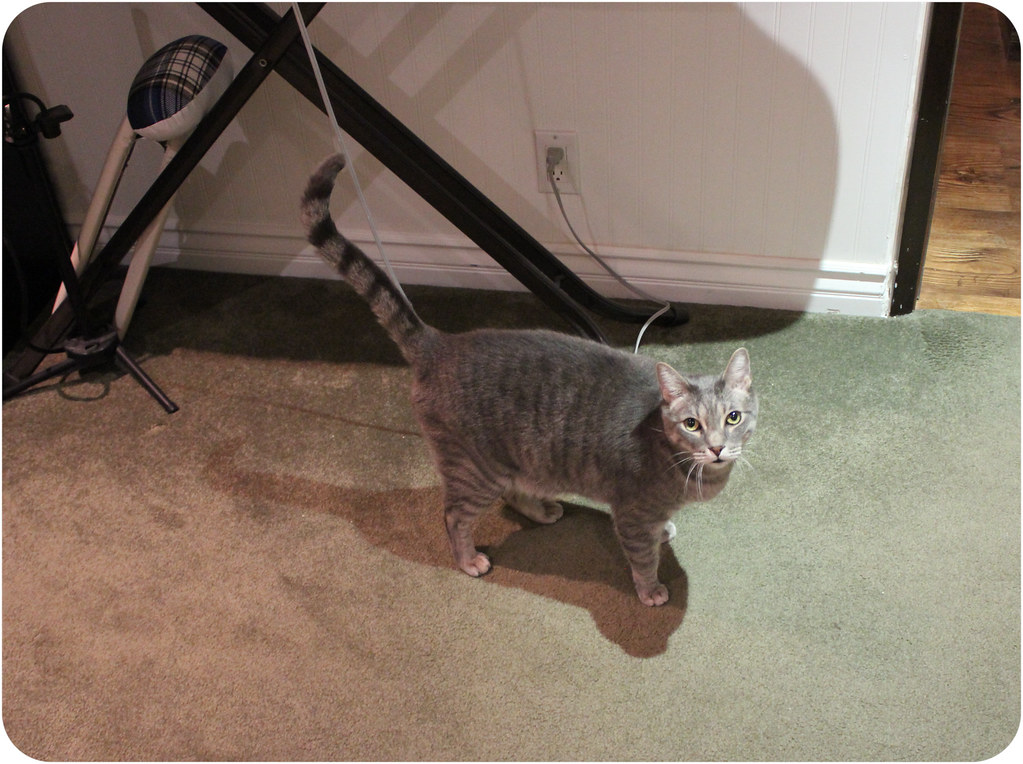
Charlie Cat says, "Don't forget to show them your hem gauge and pressing supplies!"
The ironing board stays out all the time, so those tools get stashed underneath.
Sleeve boards and tailors hams can be pricey, make sure to use a Jo-Ann's coupon to buy them.
A few reference books are close at hand, but my vintage pattern and sewing books
live in a bookcase with glass doors to keep the dust out.
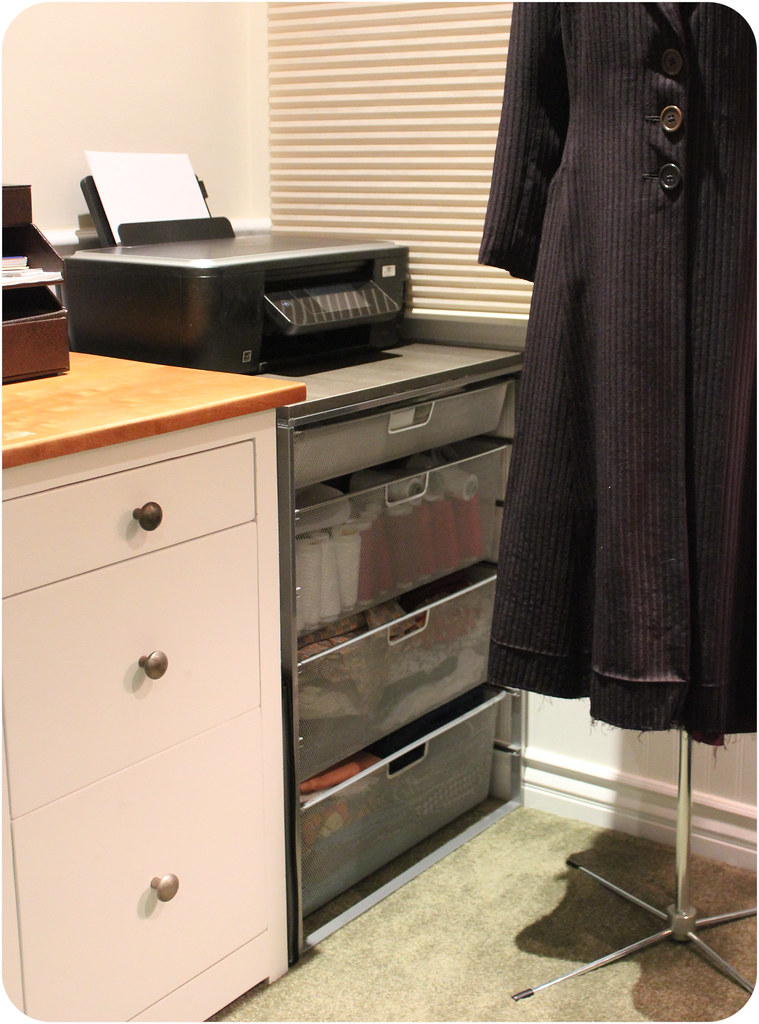
This elfa storage unit was way overpriced, but it's perfect for my needs. Interfacing in the top drawer, then cone thread, and 2 drawers of fabric that I plan to use soon.
Now it's time to get to work and mess this place up!
Saturday, November 17, 2012
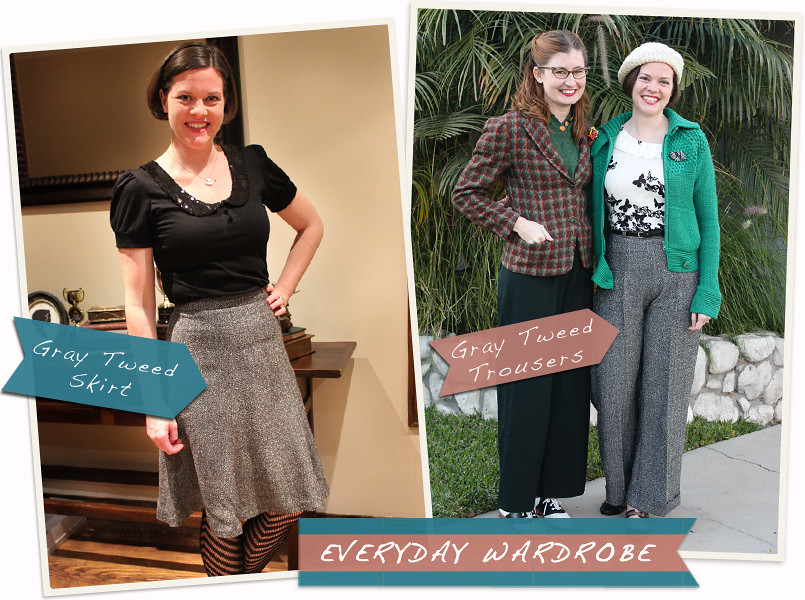
Everyday Wardrobe: Gray Tweeds
There has been some buzz lately on sewing blogs about the Everyday Wardrobe - we all have a tendency to sew/buy a lot of special pieces that aren't very versatile, and wind up wearing the same few things all the time. This topic came up right when I decided to put some fresh effort into my dance wardrobe, and I'm incorporating the idea into my current projects.
I've got 2 patterns that I plan to use over and over for my Everyday dance pieces...my dance skirt is a 6-gore style that I copied from a thrifted skirt, and the trousers pattern is Wearing History's Smooth Sailing pattern. My genius idea is that using TNT* patterns & and the same fabric means that the sewing will go quickly. Except it's not so genius when my fabric is off-grain when I cut them out, because then it means I have 2 garments to fiddle with and fix instead of one! whoops...
Here are my first additions to my Everyday (Dance) Wardrobe - my 2 TNT patterns stitched up in an gray acrylic tweed. I love using washable fabrics, so I'll pick a good synthetic/blend if it looks nice. This one really looks like wool and it's a loose weave so I think it'll still breathe.
What do you think about the Everyday Wardrobe idea? Are you joining in? or would you rather put your efforts into making fancier things?
--------------------
TNT Pattern = Tried and true pattern that you've made before and love!
Sunday, October 7, 2012
Fine & Dandy Outfit Challenge
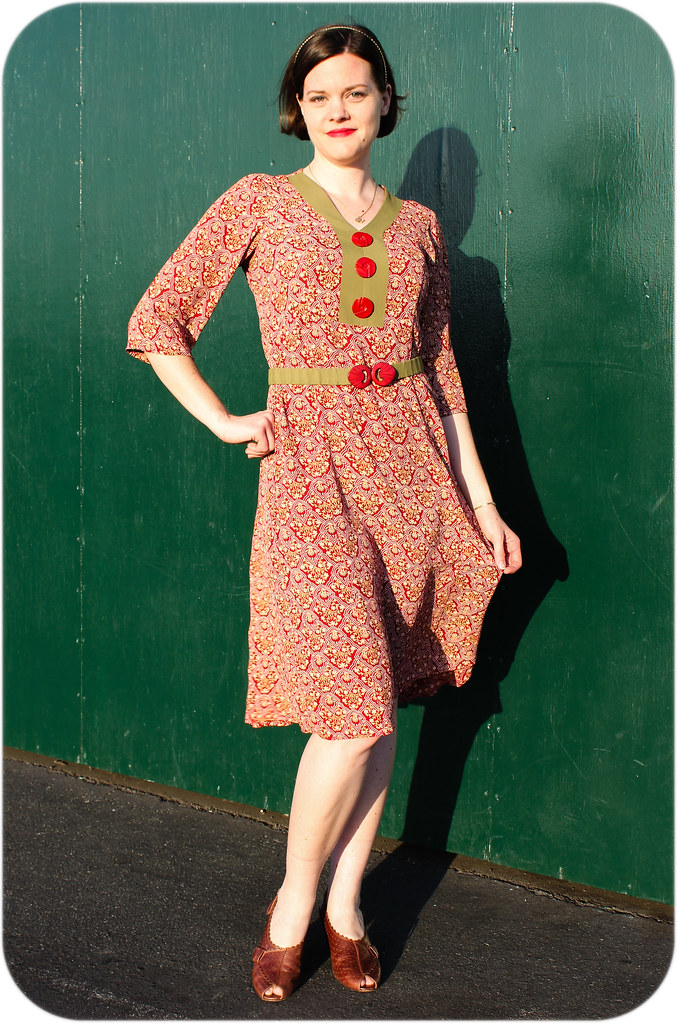
A couple weeks ago Bobby White of Fine & Dandy and Swungover challenged his readers to present a Fall-to-Summer transitional outfit. I try to confine my outfit posts to things I've made or special events, so I took this as a challenge to do a dress revamp that's been waiting a couple years.
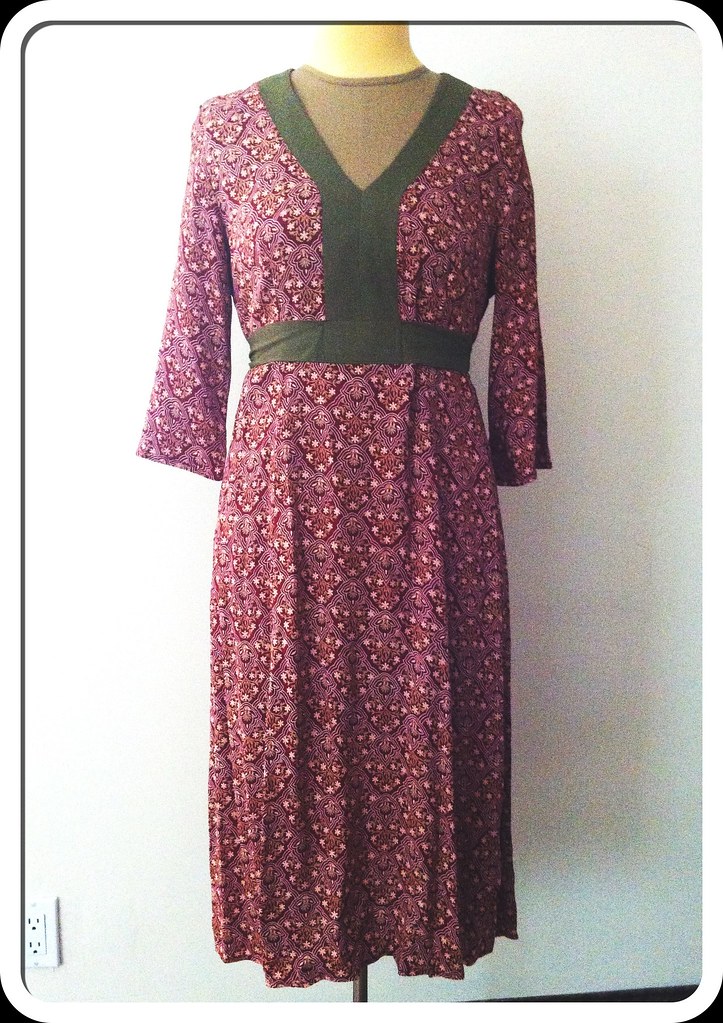
I've got a few Loco Lindo dresses that I've picked up at sample sales - I love the vintage-y rayon crepe print fabrics so I'm a sucker for grabbing ones that are too big for me with the intention of fixing them. This dress always vibed early 1930's to me, so I finally got to work at making it wearable. I wore the finished dress out dancing Friday night, and it was so much fun! The skirt length is technically too short for early 30's, but I'm more comfortable with knee-length anyway.
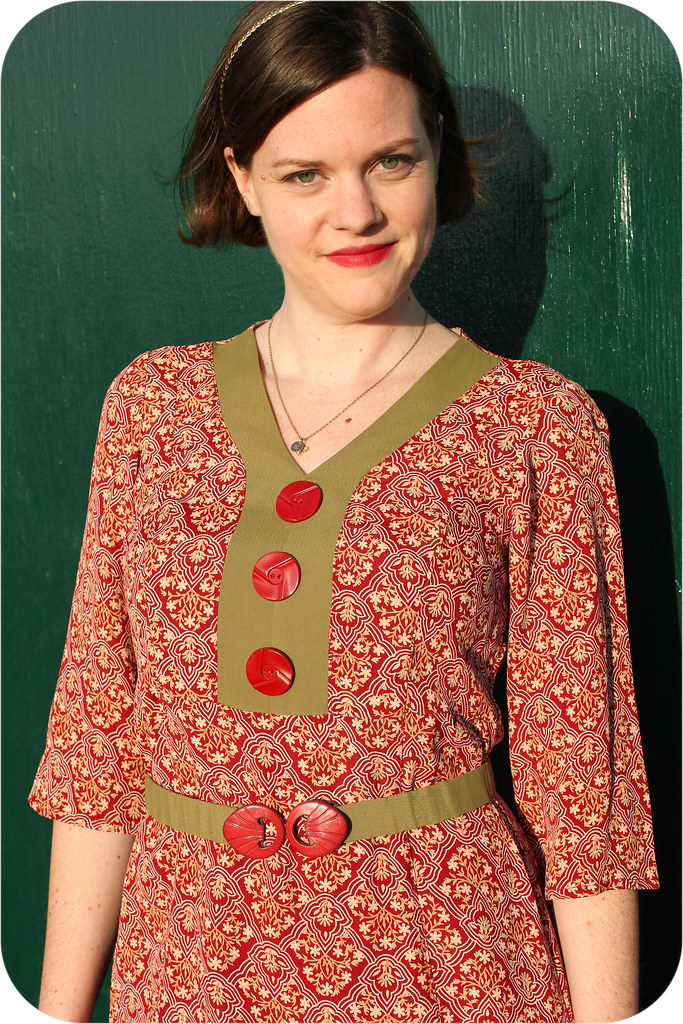
The original dress was too big in the width and length for me - I raised the shoulders about 2 inches (giving me nice high armholes that are so great for movement and dancing) and turned the front darts into princess seams to remove about 4 inches from the circumference (bodice and skirt). The green neck contrast originally wrapped around as a back neck yoke, but I lost that when I raised the shoulders, so I just added bias tape to finish the back neck.
I also removed the self tie and made it into a belt, and added some matching buttons to add to the 30's look. After I figured out how to reduce the bodice size, it was an easy revamp - but I almost didn't make the submission deadline due to being super sick the last couple weeks, so I gave up some housecleaning to finish the project. I should do that more often! ;)
I've got a few Loco Lindo dresses that I've picked up at sample sales - I love the vintage-y rayon crepe print fabrics so I'm a sucker for grabbing ones that are too big for me with the intention of fixing them. This dress always vibed early 1930's to me, so I finally got to work at making it wearable. I wore the finished dress out dancing Friday night, and it was so much fun! The skirt length is technically too short for early 30's, but I'm more comfortable with knee-length anyway.
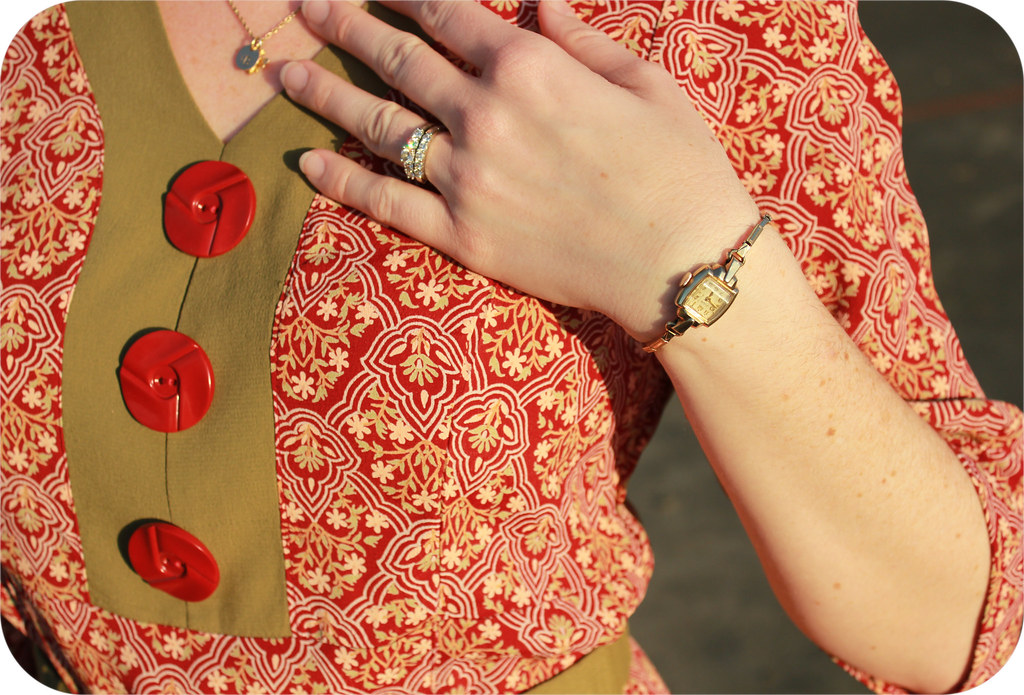
My new-to-me 30's watch, picked up at an antique mall last weekend.
It keeps good time when I remember to wind it!
I also removed the self tie and made it into a belt, and added some matching buttons to add to the 30's look. After I figured out how to reduce the bodice size, it was an easy revamp - but I almost didn't make the submission deadline due to being super sick the last couple weeks, so I gave up some housecleaning to finish the project. I should do that more often! ;)
Tuesday, June 12, 2012
Another Maharaja Costume
Since we're talking Majaraja costumes, I thought I'd share one I made for myself a few years ago. (oh, no, I just checked and it was in 2008...that was a long time ago already!!)
The Friday night theme at Camp Hollywood was Maharaja -- Chris wore a tuxedo (inspired by Hal), and I made a "1940's does Arabian Nights" playsuit - you know, like how all the costumes in period movies of the 30's & 40's look more like contemporary fashions with only a slight nod to the past. That's what I was going for.
Again, this is a rayon fabric for good swish. The skirt is a long panel that's gathered with box pleats into the waistband, and I put butterfly sleeves on the top for ease of movement.
These photos are from the Amateur Balboa contest - we got first place that year. It was also probably the best hair day of my entire life, and I like to think that had a little to do with winning. ;)
The Friday night theme at Camp Hollywood was Maharaja -- Chris wore a tuxedo (inspired by Hal), and I made a "1940's does Arabian Nights" playsuit - you know, like how all the costumes in period movies of the 30's & 40's look more like contemporary fashions with only a slight nod to the past. That's what I was going for.
Again, this is a rayon fabric for good swish. The skirt is a long panel that's gathered with box pleats into the waistband, and I put butterfly sleeves on the top for ease of movement.
These photos are from the Amateur Balboa contest - we got first place that year. It was also probably the best hair day of my entire life, and I like to think that had a little to do with winning. ;)
Labels:
Balboa,
Camp Hollywood,
jitterbug fashion,
Sewing,
Swing Dance
Monday, June 11, 2012
Maharaja Costume
A few months ago, Balboa & Lindy Hop champion Laura Keat contacted me to ask if I would be interested in making a costume for a new routine she was working on. As a rule I don't sew for other people (I don't even hem Chris's pants, he has to take them to the cleaners), but this was a special project that I was very interested in working on.
On Saturday night at All Balboa Weekend, Laura and her dance partner, Jeremy Otth, performed Hal & Betty Takier's "Maharaja", a musical short from 1943. This is one of only a few clips we have of LA Swing from the 30's & 40's, and this one is a wild ride - the energy and enthusiasm combined with their street dance technique has been hugely influential to modern balboa dancers. In honor of Hal's recent passing, Jeremy & Laura wanted to represent this in their recreation.
Inspiration: 40's Playsuit
Inspiration: High-flying skirt!
I draped the top and the skirt, and we decided to put buttons down the skirt so that it can fly open for this routine but be not as...revealing for others. :)
Cute, right? Well, get ready to be wowed - they NAILED the routine! Bummed I couldn't be at the event in person, but so glad I got to be part of it anyway!
Jeremy Otth & Laura Keat perform Hal & Betty Takier's "Maharaja" in tribute at the 2012 All Balboa Weekend
Photo by Shannon Sheldon
Labels:
Balboa,
Hal Takier,
jitterbug fashion,
Sewing,
Swing Dance
Wednesday, February 1, 2012
Playing with Toys
I picked up a new old toy for myself today - a while ago I took my grandmother's vintage Singer sewing machine into the shop, and today I finally picked it up! She's a beaut, if I do say so myself. I couldn't resist snapping a few shots with my fancy-pants Christmas camera to share with you. (I need a new hobby like I need a hole in the head, but learning photography is turning out to be fun. :)
The plates on this machine are exquisite. There was another vintage Singer at the shop that wasn't nearly as pretty. ;)
I've had the machine for maybe 5 years now, and I always knew that I *could* sew with it, but until I started reading sewing blogs it never occurred to me that a lot of people prefer the vintage machines to modern ones! Lauren and her husband inspected it for me and warned me that the electrical needed to be replaced, so off to the shop it went. She got a couple new wires, a new belt and a tuneup, and now she's ready to go. I just need to get the table out of the garage and negotiate room for it in the living room somewhere - the sewing room is full up!
In honor of my grandmother, Lucille, my new old machine is christened Lucie. :)
This is the BACK of the machine. No modern manufacturer would bother with such lovely details on the back of something anymore.
Possibly the coolest part of the whole machine - if you look close you can see the spool of thread at the bottom of the "S", and the thread goes through needles. Someone should reproduce this and make jewelry or something.
I'm a complete novice about this, but I'm discovering that the nifty thing about vintage Singers is the serial plate for each corresponds to the date of manufacture. According to the Singer website, this machine is from the end of 1940. HOW COOL IS THAT?! My dad doesn't know if the machine was bought new or used (the family moved around during the war), but he said it definitely came with them during the move from Minnesota to California in the 50's.
Now I need to find some family photos of garments that Grandma sewed right?
Aunts, come to my rescue! :D
Thursday, January 26, 2012
Regency Evening Gown 2012
As I mentioned in my previous post, I have some process shots of creating my dress for this year's Jane Austen Evening. My dress was inspired by this one from the exhibit Napoleon: The Empire of Fashion - I've drooled over the dress ever since I bought the catalog, and when I found some sheer striped fabric in the LA garment district I decided to give it a shot.
---------------------------------------------------------------------------------------------------
Inspiration
The below 3 images are found via Thomason Photography. I was happy to find this website, because the exhibit catalog doesn't show the sleeve clearly. I never found a photo of the back, so I just made it up based on my previous Regency dresses.
---------------------------------------------------------------------------------------------------
Draping
Earlier this year I bought my very first dress form, Beatrice, and she was a life saver for this project. I took all my measurements with my stays on, then put them on her, laced and padded her out to match. I draped the bodice directly on top and only had 2 fittings from start to finish, and honestly the bodice of this dress fits me better than anything else in my closet.
I had 2 fabrics to work with, my base satin and the sheer striped fabric. First step was draping the satin underlayer - I wasn't sure exactly where I wanted the neckline, so I marked a couple options and picked one in my first fitting. I think(?) I picked the lower one.
I like to make notes on my muslins during draping or fitting, so that I remember what to do to the pattern. I decided to have drawstring closures at the neck and waistline, and because I wanted a slight gathered effect, I added a little extra to the CB of the pattern when I traced off my muslin.
I don't have a shot of the side view, but I kept the armhole really high, right under the armpit. High armholes are not the standard in today's clothing but they are crucial for good movement (especially in non-stretch fabrics!), and since I would be dancing in this dress I wanted to be able to lift my arms!
Next I draped my sheer striped fabric on top of my muslin. Luckily this fabric was not expensive, so I bought extra and decided to drape directly in the real fabric, and knew I could start over if I had too. As you can see, the bodice is bias like the original. Love directional stripes! (OK, all stripes are directional, but you know what I mean.)
I don't even want to remember how long it took me to drape this darn bodice! Hours, literally. Getting all the tucks and poufiness placed correctly and flatteringly was really hard. I draped half, marked all the tucks, and then transfered it to the other side on the flat. The over layers of the bodice are flatlined to the satin.
---------------------------------------------------------------------------------------------------
Construction
The rest was fairly easy! So of course I didn't take process shots of it, grr. The neckline is finished with bias binding casing and trimmed with lace and a beaded trim, and I slipstitched the waistline seam allowance closed to create a casing. Here's the inside view of the front - yes, I overlocked the inside seam allowances!
For the skirt and sleeves, I used my modified Sense & Sensibility pattern from last year and just added the striped overskirt, which was a couple of rectangles with a bunch of box pleats. I did the CB placket wrong because the edges are supposed to butt up to each other, but my placket is for edges that overlap. Oh well, that's nothing a little hook and eye can't fix!
The Finished Dress!!
Whew! Thanks for indulging me that post, and congrats if you made it to the end! ;)
Labels:
1812,
construction,
FR 1812,
Historical Fashion,
Jane Austen Evening,
Regency,
Sewing,
YWU 1812
Sunday, November 27, 2011
Sense and Sensibility Chemise
Today is the end of the long Thanksgiving weekend here in the US, and I thoroughly enjoyed every bit of it! We visited with family on Wednesday and Thursday, and on Friday Chris and I met up with friends to go see the Debbie Reynolds costume auction preview in Beverly Hills. (other) Chris from wacky tacky and Lauren from Wearing History did write-ups of our visit, so pop over to check those out!
In other news, I've been buckling down and starting to work on some Regency wear in earnest - the annual Jane Austen Evening is at the end of January, so it's time to get going!
This week I made a chemise from the Sense and Sensibility Underthings pattern. It was nice to work on such an easy-going garment - I tend to get wrapped up in fitting, make 3 mockups, and then burn out before getting to the real thing! I'm usually of the tank-top-is-good-enough opinion when it comes to undergarments that won't be seen, but someday I want to make a nice sheer white gown, so having a proper chemise is important. It was very easy to put together, and I even did the flat felled seams. Loose fit and cotton? I might have to make more clothing like that...
I only have 2 comments regarding this pattern:
1) Even though I technically fall into the Medium size category, I made the Small chemise. It's plenty big enough! On the next one I might even remove some of the fullness - I'd rather have a slimmer chemise and add more fullness with a petticoat, if necessary.
2) For the bias casing around the neckline, the instructions say to stitch the bias tape to the neck, then fold back 1/4" on the other side of the bias tape. That's insanely hard! Press back the 1/4" BEFORE you stitch the bias tape to the neckline and you'll be much happier.
Here some photos of Beatrice wearing my chemise over the Mantua Maker stays...the stays are basically done, but I'm not entirely happy with them and still want to tweak them. But that's for another post!
Blurry Photo - whoops! :o) I shortened the chemise hem length only about an inch, and probably shouldn't have even done that. It rides up a little with the stays on.
I really like the drawstring at the neckline - it's adjustable so you can raise or lower the neckline depending on your gown. The strings are on the inside, and you tie it at the front.
Obviously, the back neckline is adjustable too. :) (Re: the stays, yes I did cross-lacing instead of spiral. I think it would be nearly impossible to get dressed in rear opening spiral laced stays without a maid!)
Side View illustrating how the stays only come halfway up the breast, and the chemise holds in the top - here's a great post about the proper fit of stays on the Oregon Regency Society blog.
Labels:
FR 1812,
Historical Fashion,
Jane Austen Evening,
pattern,
Regency,
review,
Sewing,
Stays,
YWU 1812
Tuesday, July 26, 2011
CH 2011 - "A Day at the Races" Outfit
I only made one new outfit for Camp Hollywood this year, for Friday night. The theme was A Day at the Races but it was also the night of the Balboa contest finals, so I didn't want to be too "theme-y". I decided to wear some 30's daywear but was still undecided as to exactly WHAT - until Kate posted some Summer Inspiration from 1938. The Sunback Dress (4th picture down, #7754) caught my eye and I knew that was the way to go.
And here's an action shot - the belt kept spinning around all night - I think I need a well-placed snap.
Doesn't rayon just move the best though? :)
I have a similar sundress pattern that I've made several times, so I grabbed that and headed to Jo-Ann's - and actually found some cream rayon herringbone there! Miracles do happen. The striped fabric was hiding in the upholstery section, but it softened up after washing.
![]() |
| Sundress Hollywood Pattern #1788 - c. 1939 |
And here's an action shot - the belt kept spinning around all night - I think I need a well-placed snap.
Doesn't rayon just move the best though? :)
Photo by Alex Vasallo
And last but not least, here's a video of the Balboa contest finals. Can't leave that out, I guess!
Camp Hollywood 2011 - Balboa Finals
Video by Sandra Carranza
Subscribe to:
Posts (Atom)